
DIY Giant Snowball Ornaments with Cotton Swabs
There’s something special about turning a handful of simple craft supplies into decorations that feel beautiful and festive. These giant snowball ornaments are made with plain foam balls, cotton swabs, and a little iridescent glitter to create a soft, snowy look that’s perfect for winter decorating.
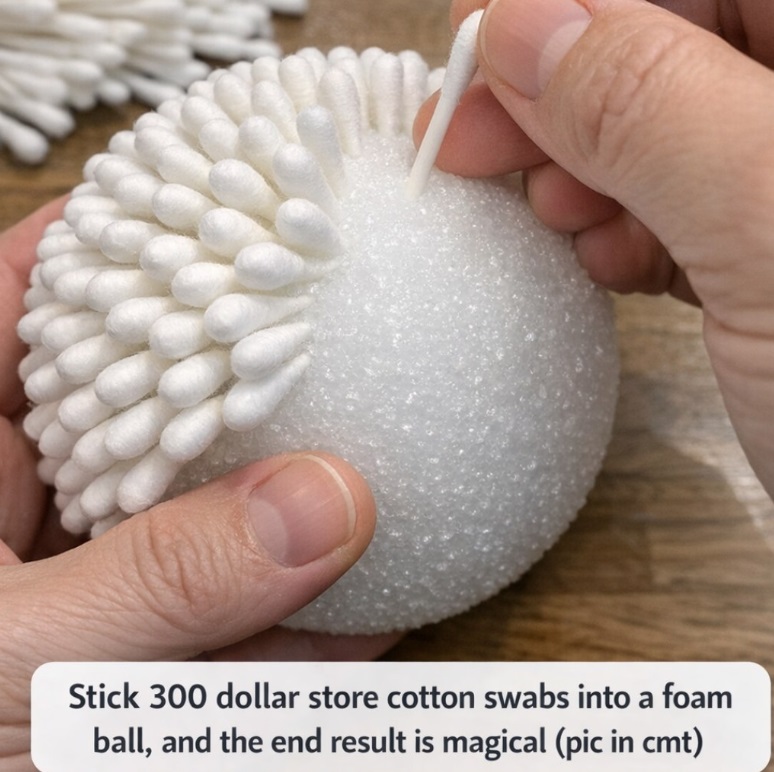
I love projects like this for a quiet afternoon at the kitchen table. The process is simple but hands-on, and it’s satisfying to watch each little cotton tip transform an ordinary foam ball into something that looks like a fluffy snowball. It does take some patience, but the finished decorations are worth the effort.
These DIY snowball ornaments look lovely displayed in a decorative bowl, arranged along a mantel, or hung from sturdy branches as part of a winter centerpiece. You can make them in different sizes to create a coordinated collection that brings a touch of sparkle to your home.
Materials
– 1 white foam craft ball, 5 to 6 inches in diameter
– 300 white cotton swabs, cut in half
– 1–2 tablespoons iridescent fine glitter
– 1 light coat of spray adhesive
– 18 inches of white ribbon, 1/4 inch wide
– 1 wooden toothpick
– 1 teaspoon strong craft glue or hot glue
– Scrap paper or a shallow box lid for catching glitter
Instructions
1. Prepare the cotton swabs. Cut each cotton swab in half so that every piece has one cotton tip and one clean cut end. Place the pieces in a bowl to keep them within easy reach.
2. Start covering the foam ball. Choose one spot on the ball and gently press the cut end of each swab piece into the foam, leaving the cotton tip facing outward. Arrange the first few pieces close together with even spacing.
3. Continue adding the cotton tips. Work in rows around the ball, turning it as you go. Keep filling the surface until the foam is covered and the cotton tips create a full, rounded appearance.
4. Fill any visible gaps. Turn the ball in your hands and check it from every angle. Add extra swab pieces wherever the foam is still visible to create a consistent, fluffy snowball texture.
5. Make the hanging loop. Fold the ribbon in half and glue the two ends around the middle of a wooden toothpick. Allow the glue to set enough to hold the ribbon securely.
6. Attach the hanger. Carefully push the glued end of the toothpick into the foam between the cotton swabs, leaving the ribbon loop visible. Add a small amount of glue around the entry point if needed to help secure it.
7. Apply the adhesive. Place the ornament over scrap paper or a shallow box lid. Lightly mist the cotton surface with spray adhesive, following the product instructions and avoiding excessive moisture.
8. Add the glitter. Sprinkle the iridescent glitter over the ornament while turning it gently to distribute the sparkle. Shake off the excess and allow the adhesive to dry completely before displaying.
Variations & Tips
- Make a matching set: Create several ornaments in different sizes. Use larger snowballs as bowl fillers and smaller ones as hanging decorations.
- Create a tabletop version: Skip the ribbon loop if you plan to display the snowballs in a bowl or tray. Cover the entire surface with cotton swabs for a finished look from every angle.
- Work in sections: Adding the cotton swabs in bands around the ball can help you maintain more even spacing and make it easier to spot uncovered areas.
- Keep the glitter subtle: A light dusting creates a delicate, frosty appearance. Apply the glitter over a box lid to catch the excess and make cleanup easier.
- Use adhesive carefully: Spray adhesive should be used according to its label, preferably outdoors or in a well-ventilated area away from flames and ignition sources. Alternatively, a thin layer of clear-drying craft glue can be used, although the finish may be less fluffy.
- Allow enough time: This is a repetitive craft rather than a quick project. A larger ball may take about an hour to cover, depending on your pace and how closely you arrange the cotton swabs.
- Store them gently: Place the finished ornaments in a roomy storage box with tissue paper around them. Avoid stacking heavy decorations on top, as pressure can crush the cotton tips.
Final Thoughts
These DIY giant snowball ornaments are a lovely way to create winter decorations with inexpensive, easy-to-find supplies. The combination of fluffy cotton tips and subtle glitter gives each ball a snowy finish that works beautifully with both traditional Christmas decor and simple winter displays.
Make a few for your mantel, arrange them in a bowl for a centerpiece, or hang them where they can catch the light. With a little patience and creativity, these homemade ornaments can become a charming part of your seasonal decorating year after year.