
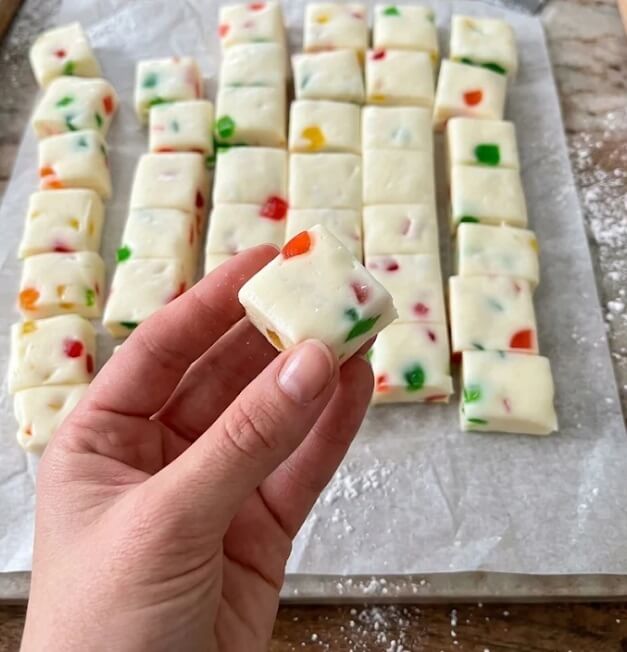
There’s always room for an old-fashioned homemade candy on a holiday dessert table, especially one that looks as cheerful as this Fruit Drop Fudge. The colorful little pieces of candied fruit bring back memories of Christmas cookie trays, homemade treats packed into tins, and family gatherings where everyone sneaks one more sweet before heading home.
This easy no-bake fudge comes together with white chocolate chips, sweetened condensed milk, vanilla, and diced candied fruit. The result is creamy, sweet, and dotted with little pops of festive color. No candy thermometer or complicated baking steps are needed.
I love making a batch ahead of the holidays because it cuts beautifully into small squares and looks lovely alongside cookies, brownies, and other homemade candies. It’s also a thoughtful little gift to tuck into a festive tin for friends and neighbors.
Recipe Details
– Servings: 36 pieces
– Prep Time: 15 minutes
– Cook Time: 5 minutes
– Chilling Time: 2 hours
– Total Time: 2 hours 20 minutes
– Cooking Method: No-Bake
Why You’ll Love This Fruit Drop Fudge Recipe
– No Baking Required: No oven or complicated candy-making techniques needed. Just melt, mix, and chill!
– Festive and Colorful: The bright candied fruit adds beautiful pops of red, green, and yellow to every little square.
– Simple Ingredients: Made with just five easy-to-find ingredients, most of which are pantry staples.
– Perfect for Sharing: Makes 36 bite-sized pieces, ideal for Christmas gatherings, cookie exchanges, and family celebrations.
– Great for Make-Ahead Treats: Prepare it ahead of time and keep it chilled until you’re ready to serve.
– Wonderful Homemade Gift: Package the little squares in holiday tins or treat bags for a sweet gift that friends and neighbors will love.
Ingredients
– 3 cups white chocolate chips
– 1 (14-ounce) can sweetened condensed milk
– 1 teaspoon vanilla extract
– 1 ½ cups diced candied fruit mix
– Pinch of salt (optional)
Directions
1. Prepare the pan: Line an 8×8-inch or 9×9-inch baking pan with parchment paper, leaving a little overhang on the sides. This makes it easier to lift out the fudge once it’s firm.
2. Melt the chocolate: Combine the white chocolate chips and sweetened condensed milk in a large microwave-safe bowl. Microwave on high for 1 minute, then stir. Continue heating in 30-second intervals, stirring after each one, until the mixture is smooth and melted. You can also use a double boiler over gently simmering water.
3. Add the vanilla: Remove the bowl from the heat and stir in the vanilla extract and a pinch of salt until everything is well combined.
4. Fold in the fruit: Add the diced candied fruit and gently fold it into the white chocolate mixture, making sure the colorful pieces are evenly distributed.
5. Fill the pan: Pour the mixture into the prepared baking pan. Use a spatula to spread it evenly and smooth the top.
6. Chill until firm: Refrigerate for 2–3 hours, or until the fudge is completely set and firm enough to cut.
7. Cut into squares: Lift the fudge out using the parchment paper overhang. Place it on a cutting board and cut into small squares with a sharp knife. Serve or store in an airtight container.
Variations & Tips
– Add some crunch: Stir in ½ cup chopped pecans or walnuts for a little extra texture.
– Try a citrus twist: Add 1 teaspoon of orange or lemon zest to brighten the sweet white chocolate flavor.
– Use different fruit: Candied cherries, pineapple, and citrus peel are lovely alternatives to a mixed candied fruit blend.
– Change the chocolate: Milk or dark chocolate can be used for a different version, although the finished fudge will have a different flavor and appearance.
– Make clean cuts: Warm a sharp knife under hot water, wipe it dry, and slice the fudge. Repeat between cuts for neater squares.
– Melt gently: White chocolate can become thick or grainy if overheated, so use short microwave intervals and stir frequently.
– Give it time to set: Let the fudge chill completely before cutting. This helps the squares hold their shape.
Share this Recipe!