Introduction
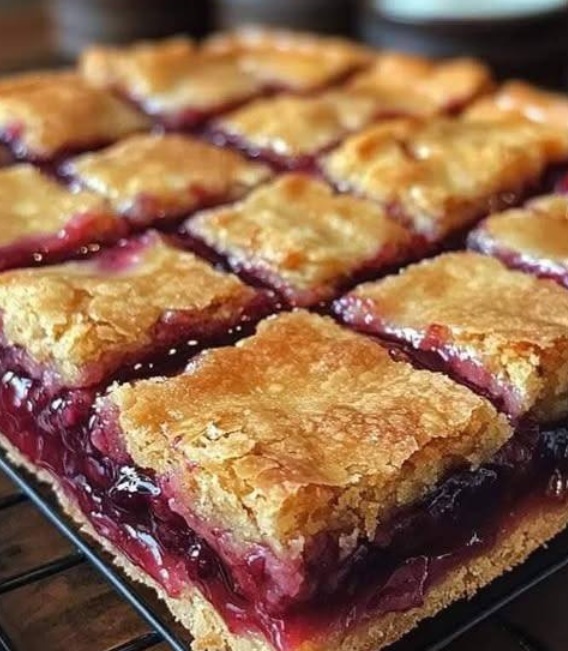
There’s something magical about recipes that take us back to childhood, the kind that instantly sparks memories of cozy kitchens and sweet moments with family. Cherry Bars are one of those timeless treats—simple, comforting, and bursting with cherry goodness in every bite.
These bars are perfect for a weekend bake or a last-minute dessert when friends drop by. With their buttery base, luscious cherry filling, and a delicate glaze on top, they strike the perfect balance between sweet and indulgent without being overly complicated. Even novice bakers can make these with confidence.
What makes Cherry Bars extra special is how versatile they are. Pair them with a scoop of vanilla ice cream for a decadent dessert, pack them for lunchboxes, or serve them at parties—everyone will ask for seconds.
What You Need
For the Bars:
1 cup butter, softened
2 cups sugar
1 teaspoon salt
4 large eggs
1 teaspoon vanilla extract
1/4 teaspoon almond extract
3 cups all-purpose flour
2 cans (21 ounces each) cherry pie filling
For the Glaze:
1 cup confectioners’ sugar
1/2 teaspoon vanilla extract
1/2 teaspoon almond extract
2–3 tablespoons whole milk
How to Make Cherry Bars
- Preheat your oven to 350°F (175°C). Grease a 15x10x1-inch baking pan.
- In a large bowl, cream butter, sugar, and salt until light and fluffy.
-
Add eggs one at a time, beating well after each addition. Stir in vanilla and almond extracts.
Gradually add flour, mixing until fully incorporated. - Spread 3 cups of the dough evenly into the prepared pan. Top with cherry pie filling.
- Drop the remaining dough by teaspoonfuls over the cherries. Bake for 35–40 minutes or until golden brown.
- Let cool completely in the pan on a wire rack.
- To make the glaze, whisk together confectioners’ sugar, extracts, and enough milk to reach desired consistency. Drizzle over the cooled bars.
Why You’ll Love This Recipe
- Easy & Quick: No complicated steps—just mix, layer, and bake.
- Kid-Friendly: Sweet, chewy, and fun to make with little helpers.
- Crowd-Pleaser: Perfect for potlucks, family gatherings, or holiday tables.
Tips for the Best Cherry Bars
- Use room-temperature butter for easier creaming and a fluffier texture.
- Don’t overmix the dough once the flour is added to keep bars tender.
- Spread pie filling evenly for consistent cherry coverage in every bite.
Variations
- Other Fruits: Swap cherry filling for blueberry, apple, or peach pie filling.
- Nutty Twist: Sprinkle chopped pecans or almonds on top before baking.
- Chocolate Drizzle: Melt semi-sweet chocolate and drizzle over the glaze for extra indulgence.
FAQs
-
Q1: Can I make these ahead of time?
Yes! Cherry Bars taste great stored in an airtight container for up to 3 days. - Q2: Can I freeze them?
Absolutely. Wrap tightly in plastic wrap and freeze for up to 2 months. - Q3: Can I use fresh cherries instead of pie filling?
Yes, but cook them with sugar until slightly thickened before using. - Q4: Can I make mini bars?
Yes, bake in a smaller pan and adjust the baking time to 25–30 minutes. - Q5: Can I use margarine instead of butter?
Butter is preferred for flavor, but margarine can work in a pinch. - Q6: Can I make these gluten-free?
Yes, replace all-purpose flour with a 1:1 gluten-free flour blend. - Q7: Do I have to use almond extract?
No, vanilla alone works, but almond adds a subtle, classic cherry flavor. - Q8: Can I double the recipe?
Yes, just use a larger baking pan or bake in two batches. - Q9: How thick should the dough layer be?
About 3/4 inch for a perfect balance of crust and filling. - Q10: Can I skip the glaze?
Yes, but it adds a lovely finishing touch and extra sweetness.
Health Benefits
While indulgent, cherries are rich in antioxidants, vitamins, and fiber. Using real butter and eggs provides protein and healthy fats, making these bars a treat that also satisfies.
How to Serve
- Slice into squares or rectangles.
- Serve with vanilla ice cream or whipped cream.
- Great for afternoon tea, dessert tables, or picnic treats.
Make Ahead & Storage
- Room Temperature: Store in an airtight container for 2–3 days.
- Refrigerator: Keeps fresh for up to a week.
- Freezer: Wrap tightly in foil and freeze up to 2 months. Thaw before serving.
Conclusion
Cherry Bars are more than just a dessert—they’re a little bite of nostalgia, a comforting treat, and a versatile snack all in one. Easy to make, crowd-pleasing, and endlessly adaptable, they deserve a spot in your family recipe rotation. Bring a batch to your next gathering, and watch them disappear!