Introduction
There’s something uniquely comforting and incredibly rewarding about the aroma of freshly baked bread wafting through your home. It’s a scent that instantly transports you to a place of warmth and nostalgia, promising a taste of pure, unadulterated goodness. While store-bought bread is convenient, nothing quite compares to the soft, fluffy texture and rich, wholesome flavor of a loaf made with your own hands. This classic homemade sandwich bread recipe isn’t just about baking; it’s about creating a staple that will elevate your everyday meals, from simple toast in the morning to hearty sandwiches for lunch.
This recipe is designed to be straightforward and accessible, even for those who might be new to bread making. We’ll walk you through each step, from activating the yeast to shaping the perfect loaf, ensuring you achieve a consistently delicious result every time. Imagine sinking your teeth into a slice that’s perfectly golden on the outside and incredibly tender on the inside – that’s the magic of this classic sandwich bread. It’s robust enough to hold up to your favorite fillings, yet delicate enough to simply enjoy with a smear of butter. Once you experience the joy of baking your own bread, you’ll wonder why you ever bought it from the store.
Beyond its incredible taste, making bread at home gives you complete control over the ingredients, allowing you to avoid preservatives and artificial additives often found in commercial loaves. This recipe uses simple, wholesome ingredients you likely already have in your pantry, transforming them into a culinary masterpiece. Get ready to impress your family and friends, and most importantly, treat yourself to the unmatched pleasure of homemade bread. Let’s dive in and create a loaf that will quickly become a cherished part of your kitchen repertoire.
Nutritional Information
Per serving (approximate values, based on 12 slices per loaf):
Calories: 180
Protein: 6g
Carbohydrates: 32g
Fat: 3g
Fiber: 1g
Sodium: 250mg
Ingredients
2 cups warm milk (105-115°F / 40-46°C)
2 tablespoons granulated sugar, divided
2¼ teaspoons (1 packet) active dry yeast
6 cups all-purpose flour, plus more for dusting
2 teaspoons salt
4 tablespoons unsalted butter, melted and cooled, plus more for greasing and brushing
Instructions
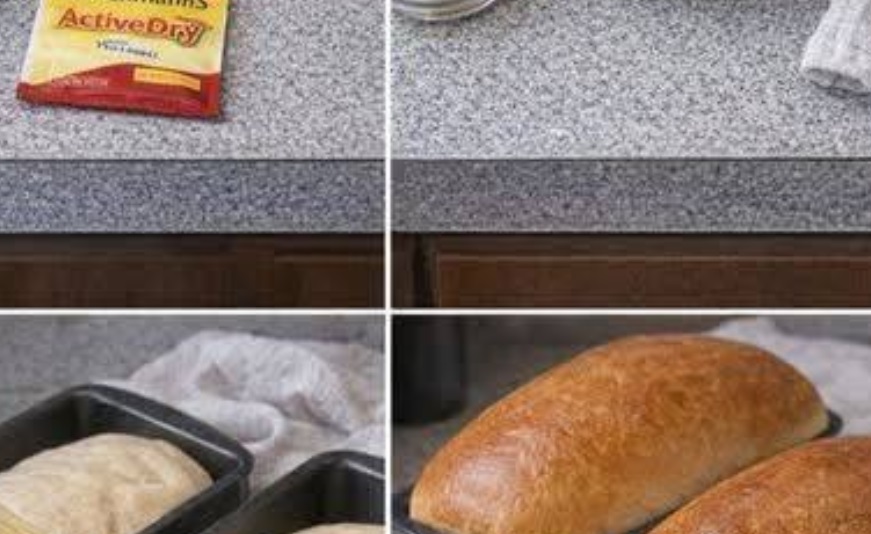
- Activate the Yeast: In a large mixing bowl, combine the warm milk and 1 tablespoon of the granulated sugar. Sprinkle the active dry yeast over the top. Stir gently and let it sit for 5-10 minutes, or until the mixture becomes foamy. This indicates the yeast is active and ready to go.
- Combine Dry Ingredients: In a separate large bowl, whisk together 5½ cups of the all-purpose flour and the salt.
- Mix the Dough: Add the remaining 1 tablespoon of granulated sugar and the melted and cooled butter to the activated yeast mixture. Stir well. Gradually add the flour mixture to the wet ingredients, mixing with a sturdy spoon or your hands until a shaggy dough forms.
- Knead the Dough: Turn the dough out onto a lightly floured surface. Knead for 8-10 minutes, or until the dough is smooth, elastic, and no longer sticky. If the dough is too sticky, add a very small amount of flour, a tablespoon at a time, until it reaches the right consistency. To test for proper kneading, perform the “windowpane test”: pinch off a small piece of dough and gently stretch it. If you can stretch it thin enough to see light through it without tearing, it’s ready.
- First Rise (Bulk Fermentation): Lightly grease a large bowl with butter or cooking spray. Place the kneaded dough in the bowl, turning it once to coat the top. Cover the bowl tightly with plastic wrap or a clean kitchen towel. Let the dough rise in a warm, draft-free place for 1 to 1½ hours, or until it has doubled in size.
- Prepare Loaf Pans: While the dough is rising, lightly grease two 9×5-inch loaf pans with butter or cooking spray.
- Shape the Loaves: Once the dough has doubled, gently punch it down to release the air. Turn the dough out onto a lightly floured surface and divide it into two equal portions. For each portion, flatten the dough into a rectangle (about 9×12 inches). Starting from one of the shorter ends, tightly roll the dough into a log. Pinch the seam closed along the bottom and tuck the ends under to create a neat loaf shape. Place each shaped dough log, seam-side down, into the prepared loaf pans.
- Second Rise (Proofing): Cover the loaf pans loosely with plastic wrap or a clean kitchen towel. Let the dough rise again in a warm, draft-free place for another 30-45 minutes, or until the dough has risen about 1 inch above the rim of the pans. While the dough is doing its second rise, preheat your oven to 375°F (190°C).
- Bake the Bread: Once the loaves have risen sufficiently, place them in the preheated oven. Bake for 30-35 minutes, or until the tops are golden brown and the internal temperature reaches 200-210°F (93-99°C) with an instant-read thermometer. For a softer crust, you can brush the tops with melted butter immediately after removing them from the oven.
- Cool Completely: Carefully remove the loaves from the oven. Let them cool in the pans for 5-10 minutes before transferring them to a wire rack to cool completely. Cooling completely is crucial for the internal structure and texture of the bread. Resist the urge to slice into them too soon!